An electric kettle is indispensable in any kitchen, whether it is home or office, catering. He is a sales leader, is produced in large batches, has the widest line of models. But, like any other equipment, an electric kettle may fail after a while. There may be several reasons for this, since this device works according to a rather simple principle. It is also easy to repair on its own. The only drawback is the disassembly of the device itself, because in order to diagnose or replace elementary components, you must completely disassemble the kettle. And the most difficult stage is the initial stage, so many who start self-repair are interested in the question of how to disassemble the lid of the kettle and what are the next steps.
How to disassemble and repair an electric kettle
But before starting the repair, you need to understand the principle of operation of the device and are the models of electric kettles different and how?
Principle of operation
Electric kettle, regardless of models and class, works on the same principle. In its lower part there is a heater; it can be open or closed. It connects to a thermostat, which consists of a plate. When current is applied, the heating element starts to warm up, thereby heating the water in the tank. When the liquid boils, steam forms, which rises up the device and enters a special channel where the temperature regulator is located, which controls the operation of the device and is responsible for shutting down after boiling the water. But despite all the simplicity of work, many do not know how to properly disassemble an electric kettle and do it right. Because different models of devices have differently located latches that snap off the handle of the device.

Common Malfunctions
The electric kettle, as already mentioned, has a fairly simple principle of operation. It contains a small number of elements that can break, thereby causing damage to the entire device. Among the most common problems that users may encounter, it is worth highlighting:
- An electric kettle slowly warms up the water.
- It turns off before the liquid in it boils.
- The device does not turn off.
- The kettle does not turn on, TEN does not warm.
Electric kettle repair
Slow heating and shutdown until boiling
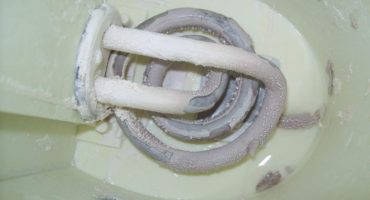
Both of these malfunctions can be caused by excessive scale formation on the heater. In the first case, slow heating is caused by a large layer of deposits, which prevents the liquid from warming up quickly. To fix this, you just need to descale the kettle. There are many ways to do this using special tools and folk methods. This procedure is mandatory, otherwise the heater may burn out.
As for the second type of malfunction - turning off the device before boiling - and in this case also the heater is a cause, on which there is a large amount of scale. Each heating element, regardless of model, has a special fuse that trips immediately after the heater starts to overheat.In the event of a breakdown of this kind, it is also sufficient descale the kettle.
Scale on the heater: replacement
The kettle does not turn off
If, after boiling water, the device does not turn off and continues to heat the liquid, this can lead to the heating of the heater. There are several reasons for this malfunction. The shutdown occurs at the moment when the steam rises up due to boiling and reaches the channel through which it passes to the thermostat. The shutdown may not occur due to a broken cover, clogging of the channel with a scum or a breakdown of the temperature regulator itself. But if the first reasons can be dealt with using special tools or alternative methods for removing plaque, to repair the thermostat, you must remove the bottom cover of the case and disassemble the device completely in order to replace it.
Replacing the heater: the kettle does not turn on
A burnt heater is the most common cause of a device malfunction. It can occur for many reasons:
- constant overheating of the heating element;
- differential in the network;
- the presence of a large amount of scale.
Regardless of the model, do-it-yourself repair of an electric kettle begins with a diagnosis and verification of other reasons why it may not turn on. First of all, you need to check the outlet itself, if everything is in order, then the cord for integrity and only after that proceed to disassemble the case.
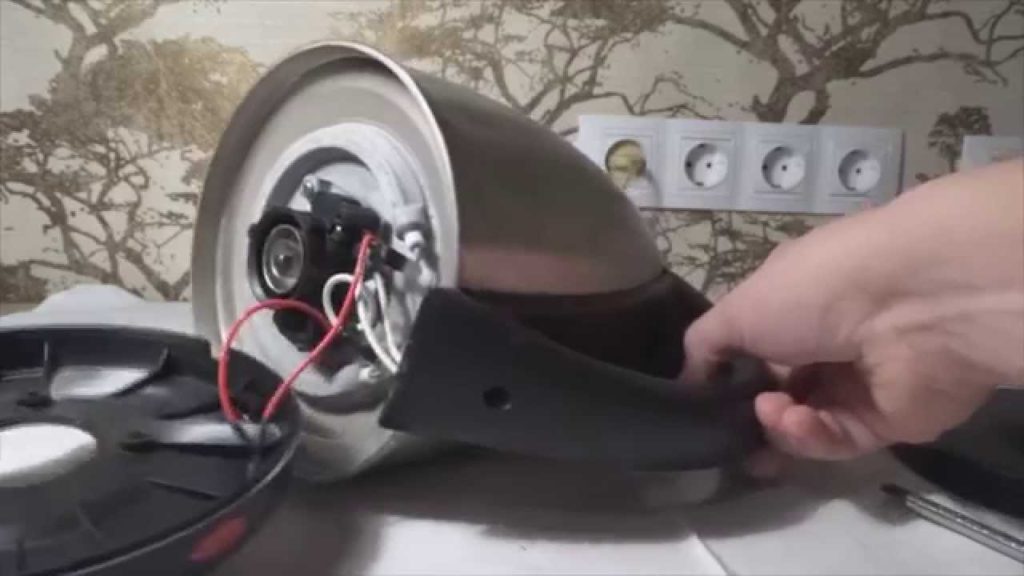
How to disassemble the body of an electric kettle with a closed heater
Regardless of the model, the device of electric kettles is almost the same, so disassembly always begins with the removal of the lid. To remove it, you need to find two screws, they can be located in different ways:
- in older models, self-tapping screws are at the top. That is, immediately after lifting the lid, access will be opened to them;
- in modern appliances, you must first remove the top of the cover. It is fixed by two grooves that enter the base of the handle. You just need to push them a little. Then, access to the screws that you need to unscrew will open.
On some models, the top cover can be removed with the handle. Therefore, before proceeding with its removal, it is necessary to study the structure and not to exert effort when removing it.
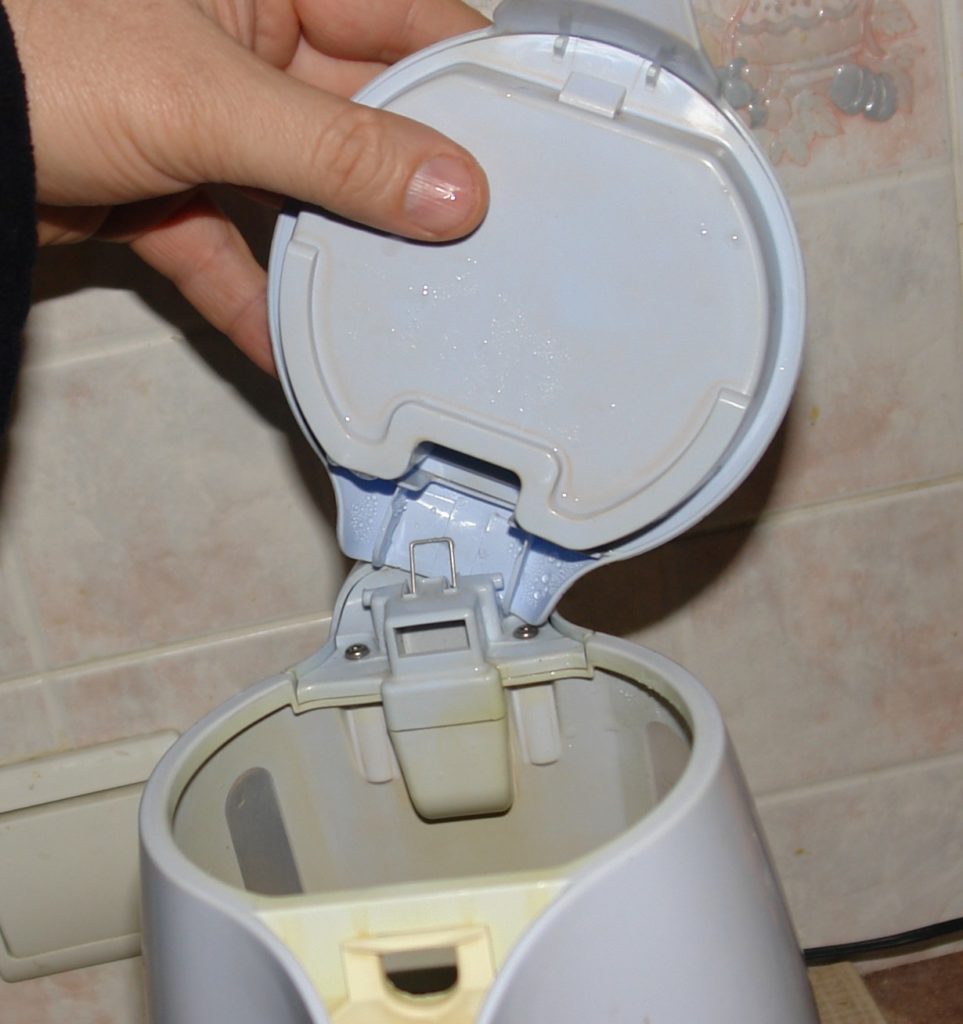
Remove the lid of the kettle
Then go to the bottom of the case. The electric kettle needs to be turned over and three self-tapping screws should be found, in some models there may be more, but they are in sight, so there should not be any difficulties with this.
We unwind the electric kettle
However, to detach the bottom, it takes a little patience and effort, as there are teeth along the perimeter that enter the opening of the housing. They must be carefully snapped off. This must be done in stages, so as not to break them and not damage the case. Most often, they snap off quickly with a slight pressure on the screwdriver. But if the device was in operation for a long time, the procedure may take a little longer, since the case may simply stick to the base.
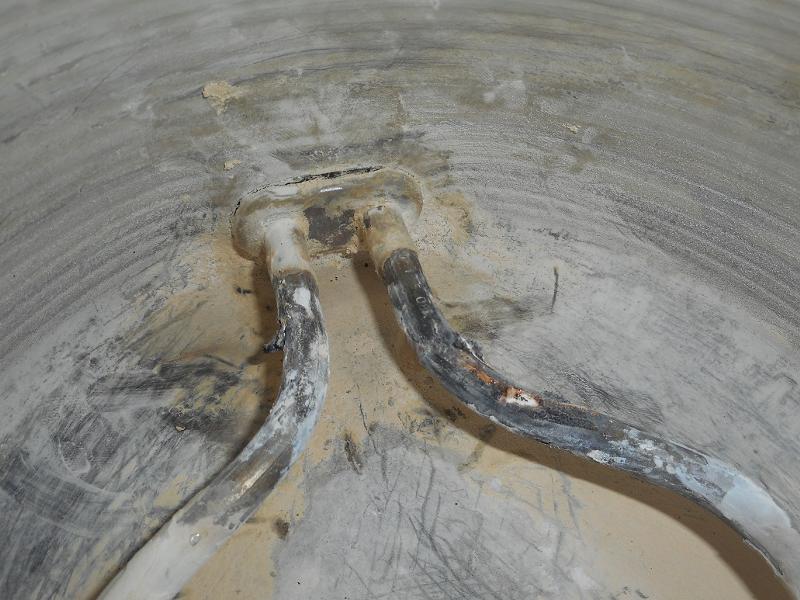
After removing the base, a heating element will appear in front of you, if it is a disk kettle in which there is no direct contact of the heater and water. If the cause of the breakdown, most likely, is the heater, then it can already be called at this stage of disassembly. This is done by a special device. With it, you can find out if there is a break in the spiral inside the heating tube, or if something happened to the contacts. If during the test the tester shows a value equal to infinity, then a replacement of the heating element is necessary. If the value is approximately from 50 to 200 Ohms, everything is in order with the heating element.
Check the heater for performance
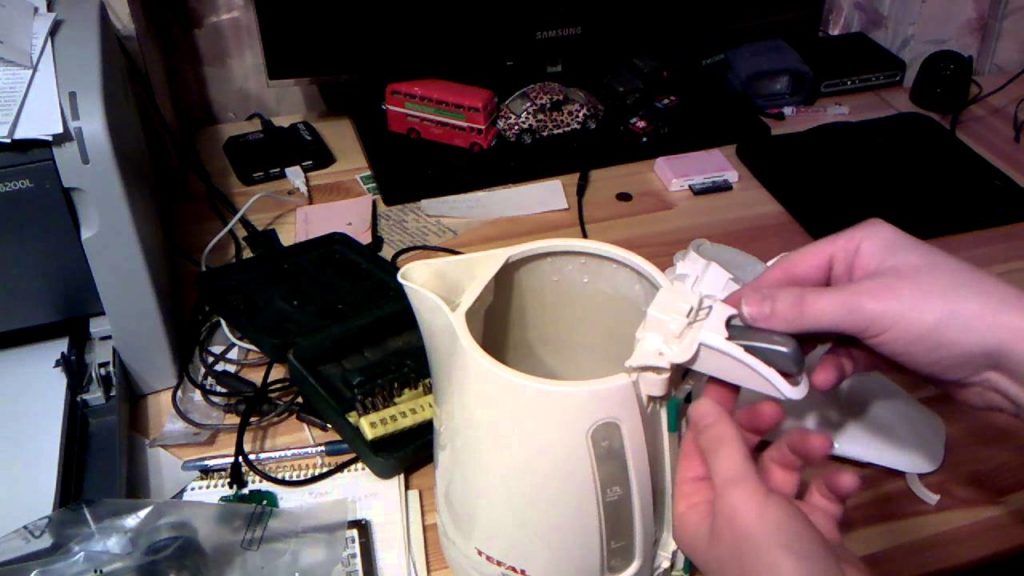
Check the thermostat or thermostat. For this, a screw is unscrewed, which is located at the bottom of the handle. Then carefully remove it. Some modern models of electric kettles can have a single handle and top cover design, so you need to carefully do all the manipulations.
We remove the handle of the electric kettle
Then inside the handle we find a self-tapping screw.It is located directly under the on / off button of the kettle. It must be unscrewed, and then removed. This will require a Phillips screwdriver. After removing it, you need to ring the thermostat - all the connection points. To disassemble the thermostat itself, you will need to remove the switch pad, they can be removed easily. Then check this item. If there is such an element, it is better to replace it. If not, we disassemble further. The overlay is removed by pressing and sliding it forward. Then you can clear all the contacts.
We disassemble the old model electric kettle
The stages of disassembly are slightly different:
- screws are unscrewed, which are located at the bottom of the device;
- removes the lower side of the device;
- then opens access to the heater, switch and thermostat.
In older models, to get to the main components of the device, you do not need to untwist the entire structure, just unscrew a few screws. However, if the power and shift button is located at the top of the handle, then complete disassembly is inevitable.
We disassemble the old-style electric kettle
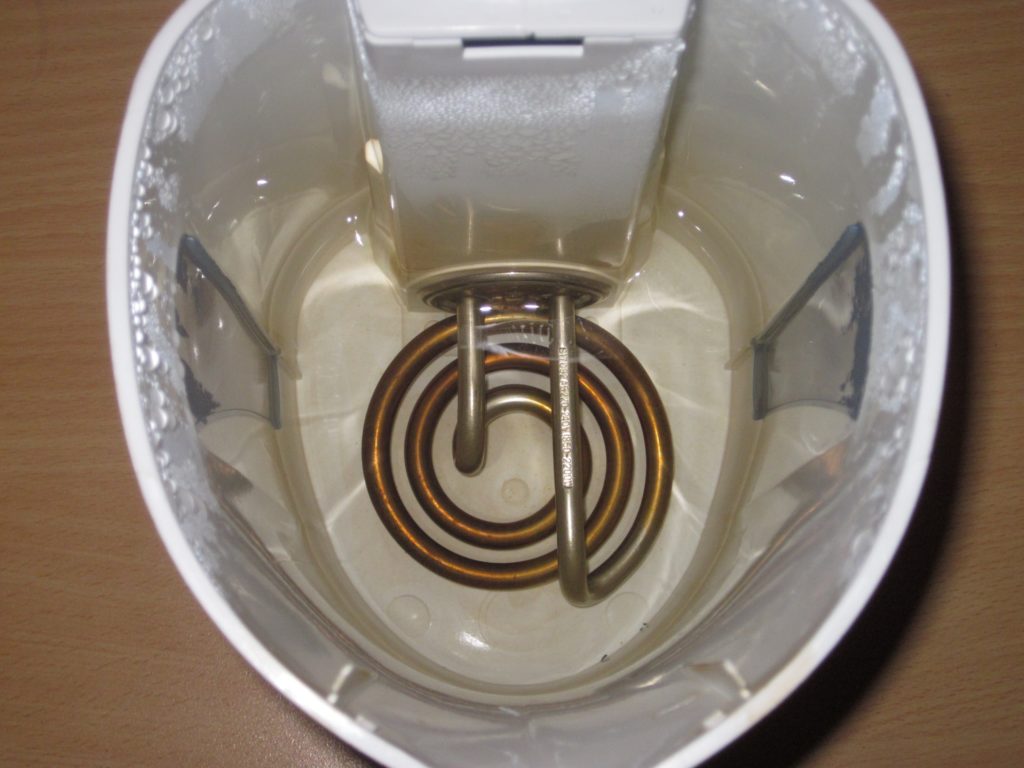
To check the operability of the heating element in teapots, where the heater is open, it is enough to remove one lid, and then it is released.
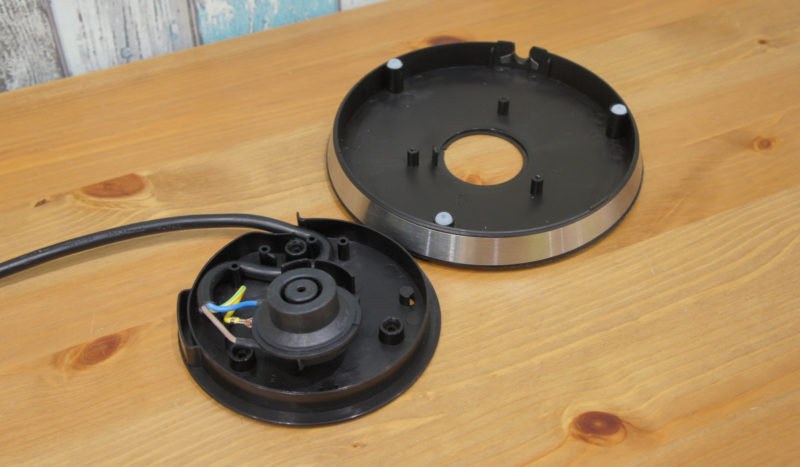
However, the cause of the breakdown may not always be directly related to the device itself. His stand may fail. Therefore, it is important to know how to disassemble the teapot stand in order to check its performance.
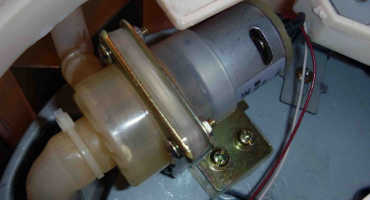
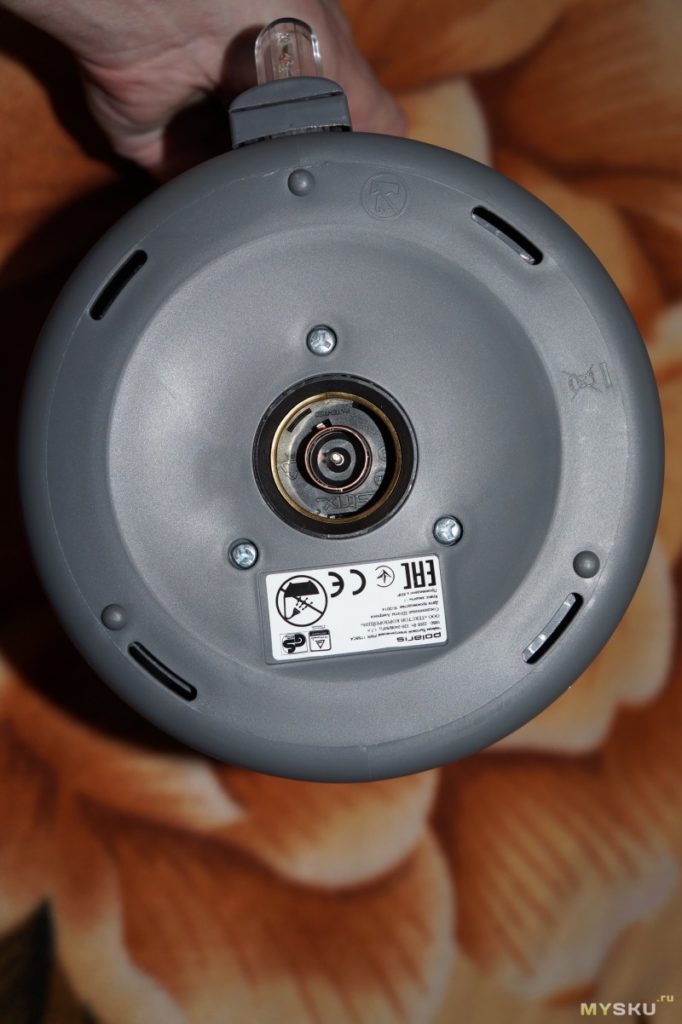
We disassemble the stand
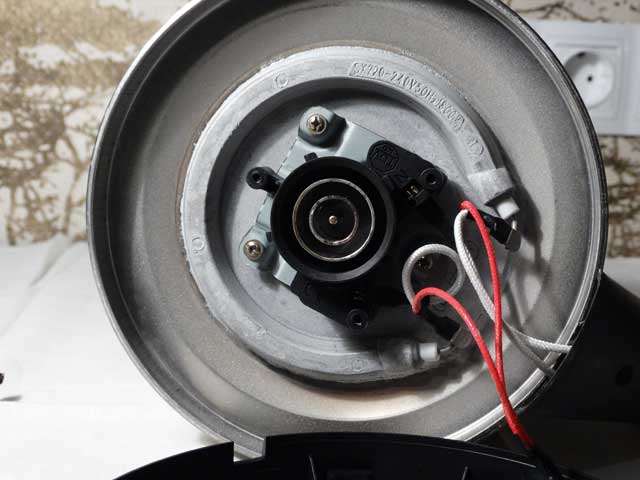
Before you start an independent repair, you need to make sure that the device is disconnected from the network. So, first of all, you need to turn the stand over and unscrew all the bolts that are present there. If this is a disk model, then at the bottom there are three bolts that are unscrewed with a Phillips screwdriver. Then the lower part of the structure is removed and a system with all the elements appears in front of you. It is easily detached from the housing.
How to disassemble the stand
We disassemble the stand of the old model. First, turn it over, unscrew all the bolts, disconnect the lower part from the top. After which all the elements will be in the public domain.
Dismantling the device, as you can see, is quite easy. However, you should never rush, as there may be some plastic latches that the manufacturer decided to install to improve the quality of the connection.